Sim Cloner
Introduction:
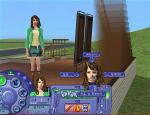
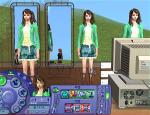
Sim Cloner is an item with which you can clone an existing sim.
It is updated to be compatiable with recent expansion packs. There are no new features added. But this patch will make the cloner work fine with new expansion packs like FT.
Category: General
Price: $0
What to download:
If you play TS2 base game or University, please download the Christianlov_SimCloner080428BaseOrUniversity zip file.
How to use:
Please buy the sculputre from the General category and then click "Clone Me" or something like that in english menu. You can also clone a neighbor.
Notice:
1. In TS2 base game or University, you can't clone sims' face. There are some limitation in those game versions. If you have EP2 or any other higher expansion pack, it will work fine.
2. You can clone virtually any sim, including dead ones.
3. Cloned sims will keep their appearance in DNA. Even if source sims received a plastic surgery, it will be saved in clone's genes.
4. This is creating a new sim, you are not doing a surgery on existing sims.
********************************************************
CustomSkintoneSelectorPrototype
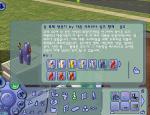
You can change skintone in game.
Category: General
Price: $0
Notice:
1. This doesn't change DNA.
2. This is a global hack.
3. It will conflict with most of the known in-game skin changer hacks. (symptom: sims revert to their original skin)
4. You need at least one expansion pack to use this.
5. You need to keep this package in the downloads folder after setting new skins for your sims. Without this file in that folder, sims will revert to their original skin.
How to write a custom selector using my CPackEditor
1. Run the program.
2. Locate the "Tool" tab control which you can find at the upper part of the program, and click it.
3. The screen will be shifted to a tool section which is composed of several tools.
4. Locate the "Custom Skintone Selector" tab control again and click it.
5. You will see two edit box controls and a few button controls.
6. Browse for the skintone folder, browse for the skintone selector prototype package (the prototype package provided in this thread).
7. Choose if you want to be prompted for the menu string using the check button control. If checked, the program will ask you to enter the menu name for every skintone it finds.
If prompted, please make use of the information provided in the prompt dialog and enter adequate menu name. The dialog will inform you of information like author's description (which is found at STR# included in most of skintone files), file size, file path, file time (write & modify time) and so on. When doing this, please use the following syntax.
Syntax: Menu.../Sub Menu ex) Author.../Some Skin
"/" means menu has a child menu there.
If you don't like to enter every skin menu name, try organizing folders before scanning. Organize folders by authors' name.
ex) D:\Skintone\Author A
D:\Skintone\Author B
Then choose "D:\Skintone" for your skintone folder (it's recursively searching, in other words, it will search for packages in all sub folders). Then the program will suggest default menu name in following manner
Author A.../Author's Description
As you can see, "Author A" is the sub folder we created. "Author's description" means strings (something like "Author A Light Tan") which can be found at string items included in the skintone package.
However, sometimes authors don't enter strings at the default language field, or don't have any string entered in the string item. In such a case, the tool will suggest menu name in following manner,
Author A.../File Title ("file title" means file name without folder path and extension)
8. Click scan.
9. After finishing scanning, be sure to keep the prototype package and skin files in the game downloads folder. (You don't need to keep the program in that folder, only the template package file and skintones)
For pictures and detailed explanation, please click the following link.
http://www.modthesims2.com/showthre...493#post1960493
How to save facial structure of sims who received plastic surgery in game using my CPackEditor
Caution (Very Important)
NO WARRANTY. YOU HAVE TO BACK UP THE NEIGHBORHOOD. I AM NOT RESPOSIBLE FOR ANY DAMAGE ON YOUR FILES.
Before fixing facial structure, please back up the whole neighborhood files. Because this tool will directly modify sim character files, it requires you to be a little more cautious. This program is provided as is, so please use it at your own risk.
Please be sure to exit the game and don't open packages while scanning, because locked files can't be opened so the tool will throw a pile of exceptions.
1. Run the program.
2. Click "tool" tab and the screen will be shifted to a tool section.
3. Click "Dna fixer" tab control again.
4. Browse for the neighborhood characters folder. (backup!!! backup!!! backup!!! )
5. Click "fix facial structure"
6. The program will search for sim character files which have more than two facial structure items and will fix them.
Only facial structure atm, no eye, skin, hair. They will be done next time.
For pictures and more detailed introduction, please click the following posts!!!
http://sumomo.modthesims2.com/showt...272#post1959272
http://sumomo.modthesims2.com/showt...274#post1959274


No comments:
Post a Comment
Note: Only a member of this blog may post a comment.